

How To Make A Raised Stone Garden
How To Build a Raised Garden Bed
Make the gardener in your family happy by building this natural stone raised garden bed
![]() Time
Time
Multiple Days
![]() Complexity
Complexity
Beginner
![]() Cost
Cost
$501-1000
Introduction
Build a raised garden bed from natural rough-cut stone that blends perfectly into the landscape. Using standard tools and a diamond-grit circular saw blade you can build this project in two weekends.
Tools Required
Materials Required
- 2x4 x 10
- Gravel
- Landscape fabric
- Mortar
- Stone
- Topsoil
Brick Raised Garden Beds Overview
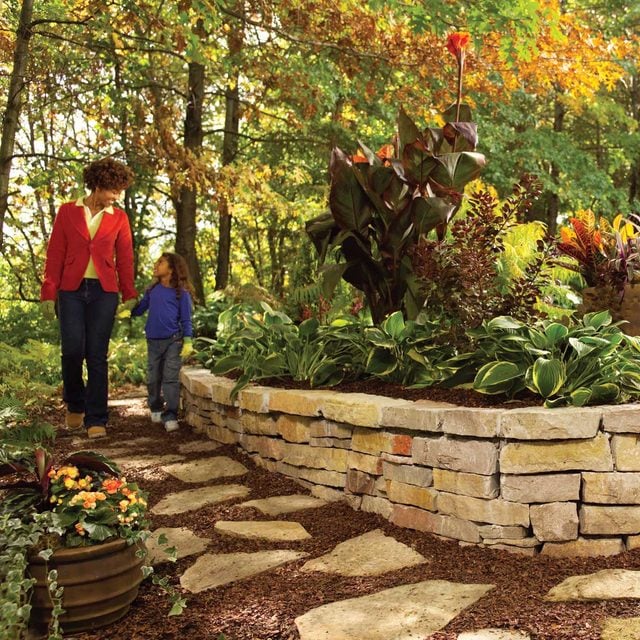
Raised bed and garden
 Family Handyman
The stone wall and flagstone path blend perfectly into a lush garden setting.
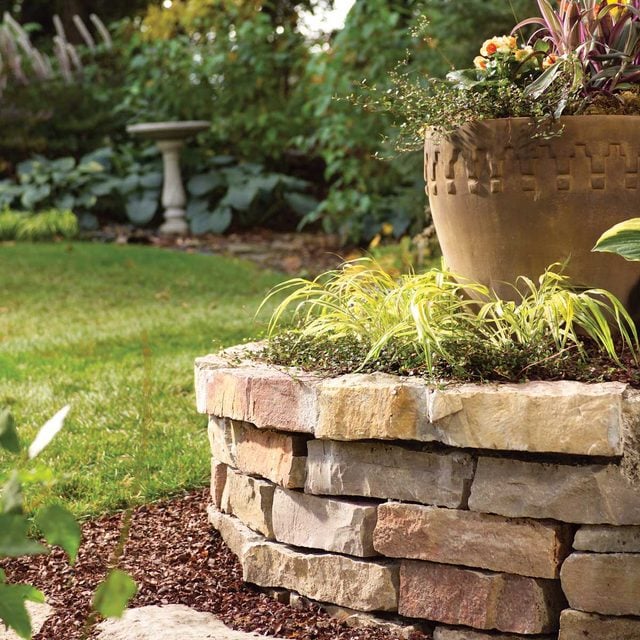
Natural stone
 Family Handyman
The rough, randomly stacked stone softens with time and weathering, growing more attractive as it ages.
If one of your family members loves plants and flowers, why not build this raised bed? It not only allows you to get just the right soil mix for healthy plants but also reduces back strain, because you don't have to bend over so far to tend it. The natural stone walls also look great and are easy to build.
In this project, we'll show you the easiest, most time-efficient way to build a stone planter that will last for decades. We'll also offer tips for sorting and placing stones so you end up with great-looking stonework. You can use these techniques to build a raised garden bed of any shape and size.
This project doesn't require any special skills, but it does require a bit of muscle to lift the stones. The only specialty tool you'll need is a diamond blade (sold at home centers) in your circular saw. Our 4-ft. x 16-ft. planter took two of us about 16 hours to complete.
Don't know where to start planning your flower beds? Check out options for a free flower bed planner here.
Plan your raised garden bed
Start by marking the planter outline on the ground, using a rope or garden hose. Dry-stacked walls like this are limited to 3 ft. in height or they could tip over. Call to have underground utilities marked in your yard before you dig and before you have materials delivered, in case you have to move your wall location. The North American One-Call Referral System number is 811.
Once you determine the shape and size of the structure, you can order the materials. Take your dimensions with you to the stone supplier, who can help determine the quantities of stone, pea gravel, landscape fabric and topsoil you'll need. Order 10 percent extra stone so you have plenty to choose from. You can always use leftovers for borders around gardens.
Browse suppliers to find a stone you like (selections are often regional). Costs vary a lot among stone types. We used a stone called weathered Chilton. We needed three tons of the stone, a yard of pea gravel and three yards of topsoil. You can use a different (and less expensive) stone, as long as it's relatively flat on the top and bottom. The more flat-surfaced and square the stones are, the easier they are to stack. The techniques we show won't work for rounded fieldstone. You can buy capstone, which is a special stone for the top course, or use the same stone as for the rest of the planter.
When you're ordering materials, ask about delivery fees and forklift services. It's worth the extra forklift charge to have the materials placed right next to the work area. Trust me on this. Our driver couldn't get his forklift to the backyard at our location, so we had to move everything by wheelbarrow (it took more than 50 trips!).
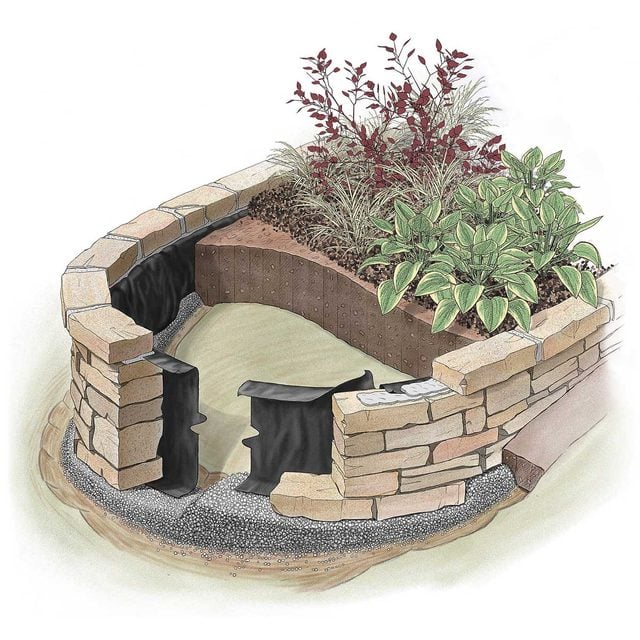
Raised Bed Details
 Family Handyman
Build the wall on a gravel base for stability and drainage, and cover the back with landscape fabric and more gravel before filling in with soil.
Sort stones by size
To make placing stones easier, first arrange them into groups based on similar thicknesses and lengths. As you sort them, set aside nice-looking stones to use as capstones. Keep their thicknesses within a 1/4-in. variation. We set aside 3-1/4-in.- to 3-1/2- in.-thick stones for our capstones.
Spread out the stones on tarps, rather than stacking them, if you have room. It'll save you from digging through the piles later to find the stones you want.
ⓘ
Project step-by-step (10)
Step 1
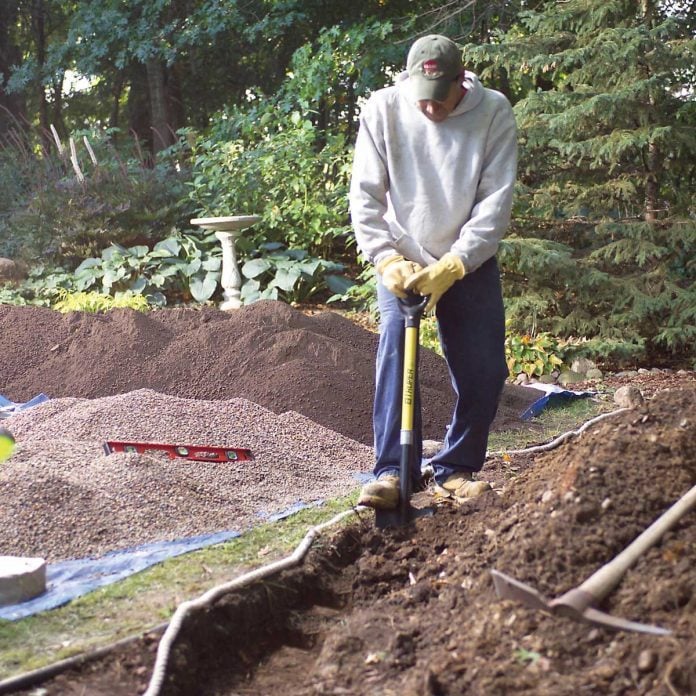
Dig the trench
- Mark the border of the raised bed with a rope.
- Dig an 8-in.-deep x 10-in.-wide trench next to the rope.
- Level the bottom and create steps to accommodate sloped areas.
- Fill the trench with 4 in. of gravel.
Use a square shovel for crisp edges and keep the trench bottom roughly level. Dig the trench deep enough to hold 4 in. of gravel and still bury at least half the first course of stone. If the yard slopes, gradually "step up" the trench to follow the slope. Make the steps match the thickness of the stones you'll use for the first course of stone. Toss the soil from the trench into the middle of the planter area for use as backfill later.
Step 2
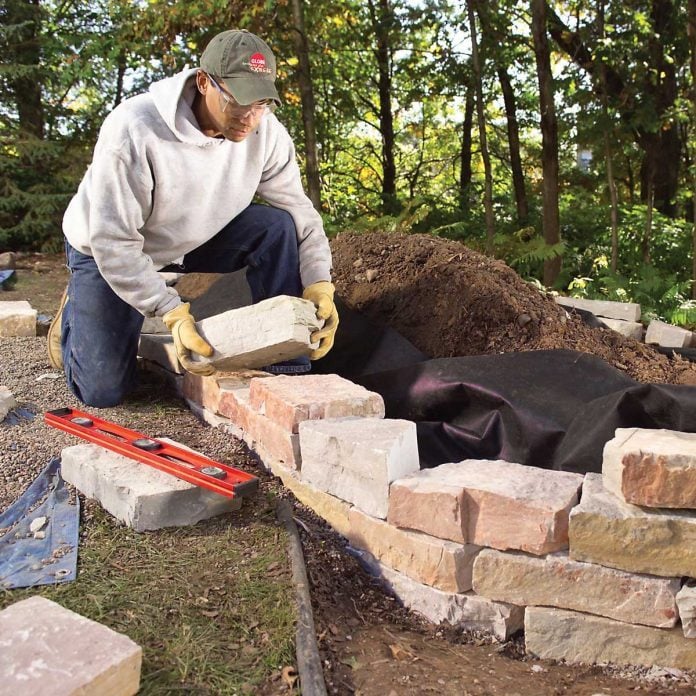
Lay the first stones
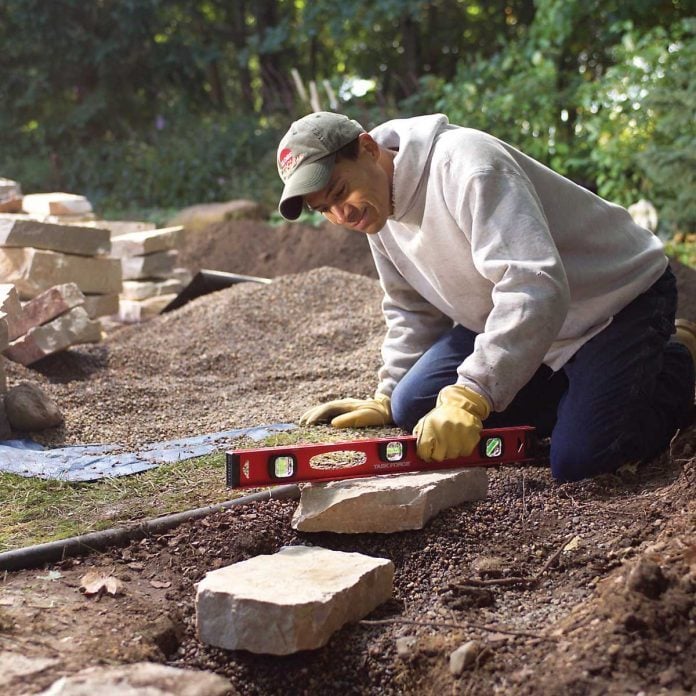
- Set stones on the gravel and check for level.
- Add or remove gravel to form a level base all along the trench.
Once the entire trench is dug, add 4 in. of pea gravel. As you add the gravel, place a stone over the top every foot or so and check for level. Add or remove gravel (a little at a time) as needed until it's roughly level. You'll fine-tune it when you install the first course of stone (called the "base course").
Sign Up For Our Newsletter
Complete DIY projects like a pro! Sign up for our newsletter!
Do It Right, Do It Yourself!
![]()
Step 3
Anchor landscape fabric
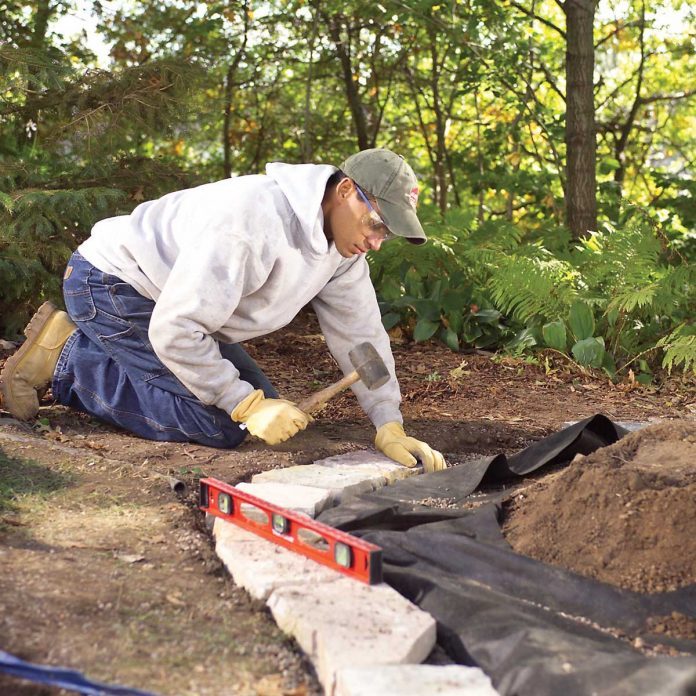
- Lay landscape fabric over the gravel, then place the base course of stones over the fabric to keep it in place.
- Check the stones for level.
- Add gravel under low stones and pound down high stones.
- Butt the outside edges of the stones tightly together.
Use the less attractive stone for the base because it'll be hidden by soil and grass. Check every couple of stones for level. Pound down high stones with a rubber mallet, and add gravel under low stones, placing the gravel on top of the fabric.
Step 4
Start the second course
- Add a second course of stones, mixing sizes and staggering the joints from the base course.
- Keep the joints tight on the exposed side.
For good-looking stonework, avoid large gaps between stones on the exposed face of the wall.
Step 5
Trim stones to fit
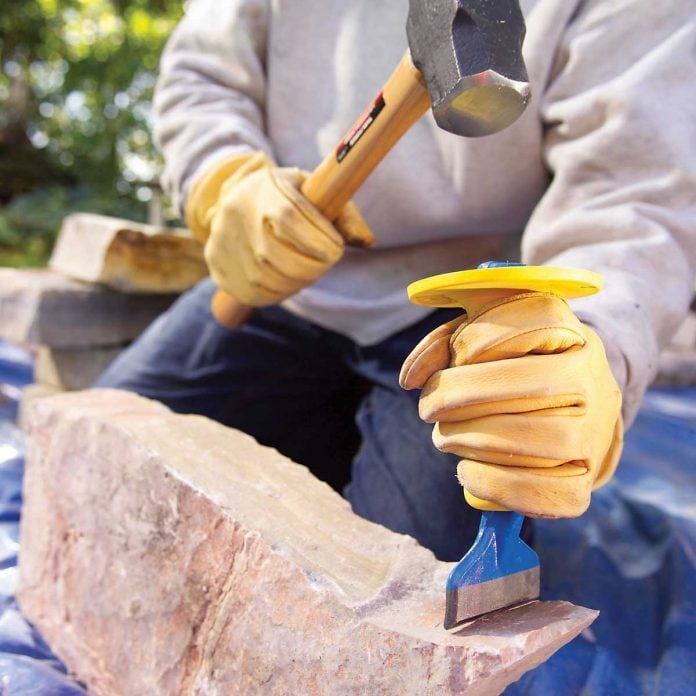
- Use a 4-lb. hand maul and masonry chisel to knock "burrs" off the stones so they fit more tightly together.
- Don't worry about gaps inside the wall; they won't be visible.
You'll have to cut some stones to fit. Mark the stone and, using a diamond blade in a circular saw, make a series of cuts about 1/8 in. deep along your mark, lowering the blade with each pass until you're one-third of the way through the stone. (To limit dust, have a helper squirt water from a spray bottle on the blade while you cut.) Then flip the stone over and cut from the opposite side. The cuts don't have to be perfectly aligned. Tap the waste side of the stone with the maul to break it off. Save the leftovers for filler.
Step 6
Backset stones
- Backset each row about 1/2 in. from the course below.
- Break up courses with thick "jumper" stones to create a random pattern.
Once the base course is installed, lay the remaining courses, except the capstone. Offset joints between courses to give the walls greater strength and to achieve a more pleasing look. Mix stone height, length and color as you lay the stones. Place exceptionally thick stones (called "jumpers") where you want to break up a uniform pattern. Backset each course about 1/2 in. inside the previous course so the wall slopes slightly inward.
The toughest part of building the planter is laying the stones in an attractive, yet seemingly random, pattern. We often set a stone in place, then moved it several times to find the best fit. Grab stones from different piles (except the capstone pile) for each course to ensure a mix of lengths and thicknesses. Take your time and don't hesitate to take a section of wall apart to redo it if it doesn't look good.
Step 7
Backfill gradually
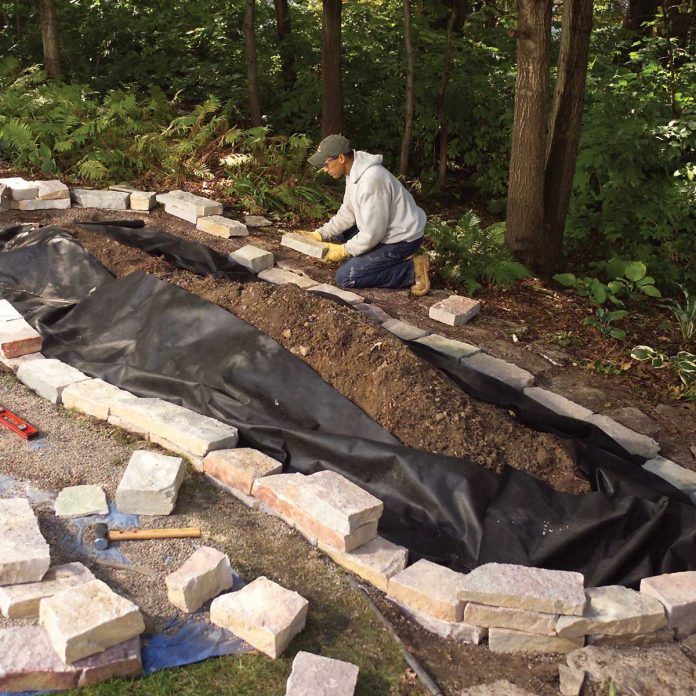
- As you complete every couple of courses, pull the landscape fabric tight against the stones and shovel backfill (topsoil) against the walls.
- Backfill to the top of the last installed row. This helps hold the stones in place.

Step 8
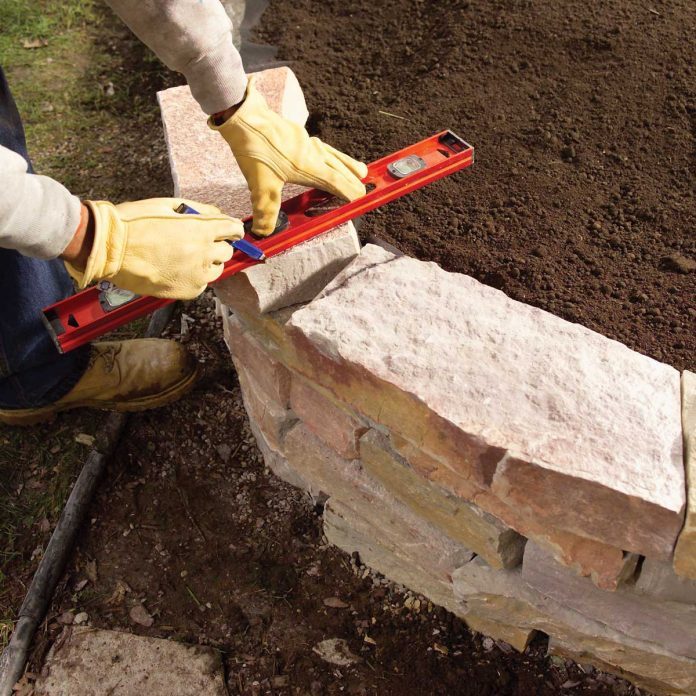
Level the last course and dry-fit the capstones
- Set capstones in place, overhanging the other courses by 2 in.
- Mark the stones and cut them to create tight joints.
- Place a straight 10-ft. 2x4 over the last course as you lay the final course to check for level.
- Now use a utility knife to trim the landscape fabric, making it cover the last course of stone by about 4 in.
- Then install the capstones so they slightly overhang the underlying courses. We made ours overhang 2 in.
- Leave gaps at least 1/4 in. wide between capstones so you can tuck mortar between them. But avoid gaps more than 3/4 in. wide because they'll look bad.
- To cut them to fit, place the first two capstones on the wall.
- Use a straightedge to mark roughly parallel lines on both stones so the edges will match. You don't have to make this cut perfect; mortar will fill the gap between them.
- After you cut them to size, set them in place.
When you're laying the final course, patiently select and place stones so the top of the entire course is flat and level (the stones should be within 1/4 in. of level with adjacent stones). That way, you can more easily lay your capstone flat and level.
If two capstones fit nicely along the outside edge but leave a large gap on the inside, fill the gap with a wedge of stone (cut to fit if necessary) rather than cutting off large sections of capstone. If the gap-filling stones aren't as thick as the capstone, make up the difference by piling more mortar beneath them.
Setting capstone is a time-consuming process, since you have to mark, cut and dry-lay them one at a time. The positions of the capstones will change slightly after cutting, so mark and fit them one at a time all along the wall.
Step 9
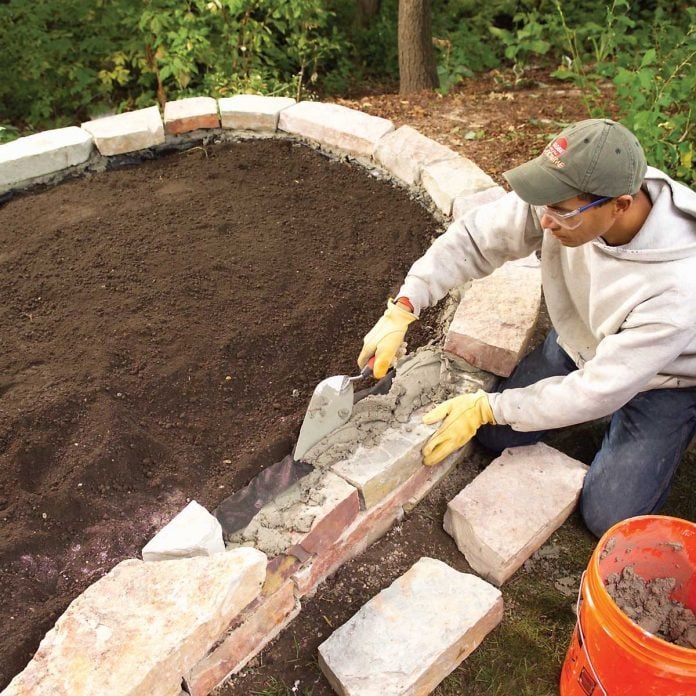
Mortar the capstones in place
- Remove a few capstones at a time and lay a 1/2-in.-thick bed of mortar over the back half of the wall.
- Fold the fabric over the mortar.
- Add another 1/2 in. of mortar, then set the capstones in place.
- Work in sections of two or three capstones at a time so the mortar doesn't dry out on the wall. Mortar and set the entire course of capstone.
Mix one bag of mortar with water in a wheelbarrow until it's the consistency of peanut butter, then put some in a 5-gallon bucket. Like any cement-based product, mortar can burn your skin, so wear gloves.
Step 10
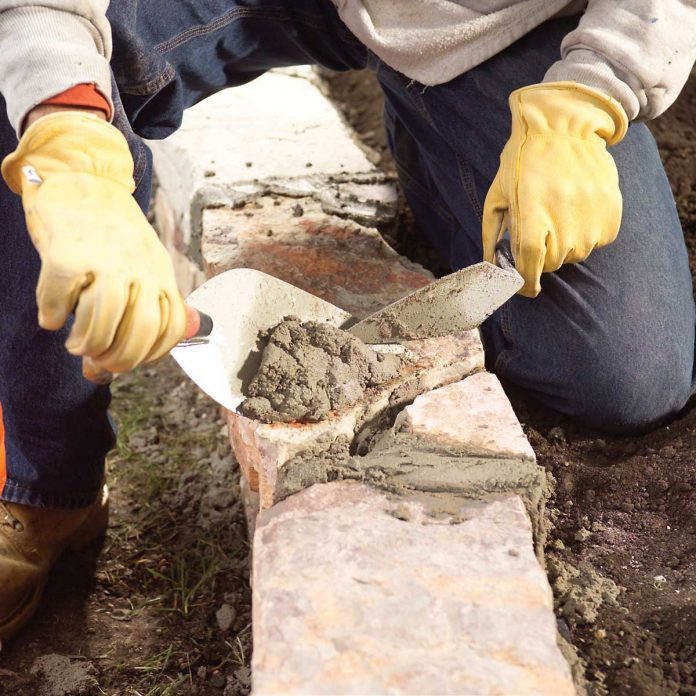
Fill the joints
- Pack mortar into the joints on the top and front of the capstones. Scoop the mortar onto one trowel, and use a second trowel to push the mortar into the joints, slightly overfilling them.
- Let the mortar dry, then use a whisk broom or a wire brush to brush away any that has splashed onto the stones.
- If you discover stains later, scrub them away with a diluted mix of muriatic acid.
- Allow the mortar to set overnight before topping off the planter with soil and mulch. Then fill it with the flowers of your choice!
How To Make A Raised Stone Garden
Source: https://www.familyhandyman.com/project/construct-a-raised-garden-bed/
Posted by: hewittsuffele.blogspot.com
0 Response to "How To Make A Raised Stone Garden"
Post a Comment